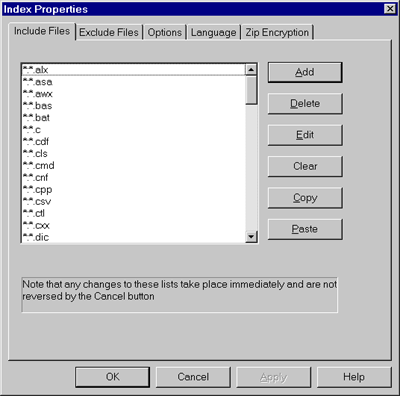
Building Your First IndexIn order to do its thing, Wilbur reads your disk and creates an index of information about the files you have. When you do a search Wilbur consults this index rather than searching through all those files again. This permits very fast searches, but means the first step in using Wilbur is to create an index. When you run Wilbur for the first time and whenever you create a new index, Wilbur will pop up a dialog that looks something like this:
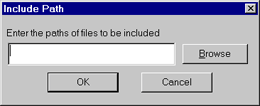
In an attempt to make things easy, Wilbur fills in the include list with the file extensions for a variety of common files that might contain text. The "*:" at the beginning of each line tells Wilbur to look on all non removable disks for files of that type, but that is a detail best left to the Include Files help page. For now we don't want to index all that stuff, so just hit the Clear button to get rid of everything, and then click on the Add button to bring up this dialog:
Click on the browse button and you will get a standard Windows file open dialog. It shows the contents of the Wilbur folder and the first entry will probably be a Help folder. Double click on this and you should see something like this, although the file names will probably be different:
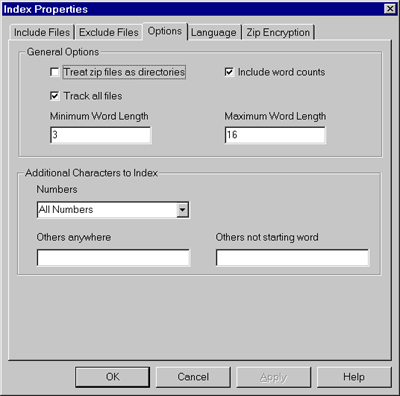
Since all of the text containing Wilbur help files have HTM as an extension, type *.htm into the File name field and click on the Open button. The Include Path dialog should reappear with the path name of these files in the input field. Hit OK to add this path to the empty include list. That is all that is really necessary, but before leaving we might as well look at the other pages in the Index Properties dialog. To switch pages, just click on the Exclude Files, Options or Language tab at the top of the dialog. The Exclude Files page is identical to the Include Files page and is used to omit files from content indexing that would otherwise be caught up in the net of included paths. For instance we could have include "*.*" in the help directory and then excluded "*.gif" to avoid indexing the images. It is usually better to be more precise with the include paths than relying on excluding files. The options page:
provides a number of useful ways of controling how your files are indexed. These are discussed on the index options help page but there are a couple of points worth noting. If you want to index the contents of zip files, don't add whatever*.zip to your include path, but instead treat the zip files like they were folders and check the "Treat zip files as directories" box on this page. We don't need this now. When the "Track all files" box is checked, then even files in the indexed directories that don't have their contents indexed will have their name, size, modification date etc. entered in the index. In our example this means all the image files will be in the index and we could search for them by name even though their contents were not indexed. When set Wilbur will include all files in all subdirectories of any directory listed in the include list. In our case this will just be the Wilbur help directory. If you wanted to just index the names of all the files on your disk, but not the contents, you could just include something like C:\*.xxx assuming you had no XXX files on C. We can leave this on for now. Finally in the additional character handling, select All Numbers in Numbers field. Okay, let's actually build the index. Just press the OK button at the bottom of the dialog and Wilbur will start scanning your files. The status line at the bottom of the window will report what is happening, but if you are lucky it will move too quickly to read easily and the index will be complete in a few seconds. A dialog box will appear with statistics on what was indexed and asking if you wish to save the index right away. Click yes and then type in an appropriate name, like help, and click on the save button. By default Wilbur indexes are saved in the indexes subfolder of your Wilbur folder. The control file has the extension WIL, but several additional files are also created with the same root name, but different extension. If you ever want to move your Wilbur index, all these files have to be move together. Doing a Search |


